Evidence-Based Practice Series
Antecedent-Based Interventions: Visual Supports
Today's Goals
- Clear understanding of evidence-based practices
- identify, define, and implement Antecedent Based Interventions
- Develop a process for determining if ABI is the best intervention to try first
- Identify, define and understand the six practices of ABI
- Identify, Define, and Implement Visual Supports, an ABI
- Use 4 Point Questionnaire to determine if Visual Supports are best for students
- Create sample visuals to try in class
Evidence-Based Practices: Nutshell Definition
3 Components of Evidence-Based Practices
Note: Some exceptions do occur when a strategy may not meet all three components, but for the individual need of the student it has been found effective. This is where the component of your professional judgment and expertise comes into account.
From the Medical Model to the Educational Model
The Medical Model:
Initially was used in school based occupational therapy practice.
The medical model was deficit centered and focused on āfixingā the child.
The therapist often worked on specific performance components and skills, muscle tone, strength, coordination, endurance.
The therapist worked out of the classroom (pull-out services) on their own specific goals.
The therapist and the teacher only teamed in theory.
Therapy was not embedded into the curriculum or the childās school day and therapeutic goals did not address the childās functioning within the school or the curriculum itself.
The child was worked on in āpartsā instead of addressed as a āwholeā (Clark & Chandler, 2013).
The child often missed class instruction.
The Educational Model:
1997 brought forth the reauthorization of PL94-142 and the change to the Individualās with Disabilities Act. This act reflected people-first language, along with Least Restrictive Environment.
This caused many OTās to now embrace educationally relevant outcomes.
The educational model looks at the āwhole childā instead of the child in āpartsā.
It focuses on making the child as independent and as functional as possible in his/her school environment.
It focuses on providing therapy in the least restrictive environment (LRE).
This model focuses on linking therapy goals to educationally relevant outcomes.
This model focuses communication and collaboration with special education and general education teachers, as well as other IEP team members.
This model focuses on embedding therapies into the childās school day (Clark & Chandler, 2013).
Laws and Resources that Stress Evidence-Based Practices
overview: 4 Functions of Behavior
ANTECEDENT-BASED INTERVENTIONS- ABI
Definition:
Take a look at the areas of impact below
Six Practices of Antecedent-Based Interventions
1. Learner Preference
addresses when function of behavior is escape/avoid
think behavioral momentum
- Easy-Easy-Hard> Easy-Hard-Easy-Easy
- Preferred Task> Non-preferred task> Preferred Task
Sandwich in the non-preferred activities between reinforcing activities to decrease the opportunity for interfering behaviors
2. Modifying environments, schedules, and routines
Students find routines and schedules comforting and calming.
Routines and schedules:
- minimize stress and anxiety related to learning new skills or accessing new environments or information
- remove confusion and difficulties comprehending information (instructions) from others
- help students predict what will happen and what is expected of them
- provide consistency necessary for learning
- teach expected behaviors necessary for group learning.
addresses when function of behavior is escape/avoid
tools to support environmental modifications
3. Pre-Activity Interventions
Pre-activity intervention is a form of āantecedent interventionā ā this means that activities or the environment are adapted before any difficulties arise so that students are better able to engage and learn.
How do I use it?
- Find out what factors might be related to difficulties with learning or engagement. It is really important to find out what is causing any difficulties with learning or engagement. It is only when the factors related to the difficulties are understood that pre-activity interventions can be helpful. Consider:
- transition ā students may have difficulty with changing classes, or moving from place to place
- change ā students may be stressed with changes in staff or activities
- difficult work ā students may find difficult work stressful or distressing
- activities that are non-preferred.
- Once the factors involved are known, it is possible to prepare students, adapt the activities or change the environment to help minimise problems and stressful situations. Examples can include:
- providing information verbally about an upcoming activity
- providing a visual support to help the student understand a change to an activity
- discussing content of classwork before class starts
- providing information about schedule changes
- using visual schedules to warn of change and/or to help the student to understand the activities planned for the day.
- Prepare materials needed for the intervention. This could include:
- Visual supports
- Visual schedule
- Pre-teaching plans and materials
- adapting the classroom as needed.
- Implement the intervention. This should happen before the student experiences difficulties (e.g. prior to a transition, prior to a change of staff).
- Observe the student to gain information about how well the pre-activity is working. Adapt as necessary ā this could include different visual supports or identifying different activities that require support.
addresses when function of behavior is to escape/avoid
4. Altering Instructional Delivery
How do I use it?
Planning- Identify the skill/knowledge you want the student to demonstrate e.g. writing a short paragraph, addition using two digit numbers.
- Based on your knowledge of the student identify what supports their learning e.g. extra time, smaller group instruction, modelling, visual reminders, template.
- Plan instructions so they follow a clear sequence e.g. each step builds on previous knowledge and provides the foundation for the next step.
Implementation Examples:
- Written instead of spoken instructions
- Video Modeling
- Visual representation of instructions
- Audio recording of instructions
addresses when function of behavior is to escape/avoid
5. Choice Making
Choice making can enhance student engagement and motivation as well as independence. Choice making provides students the opportunity to indicate their preference at certain times or during certain activities throughout the day. Offering choice gives students a sense of control in their lives and environment and as a result they are more motivated to participate. Choice making opportunities can be offered in countless ways throughout the day, and can occur within activities e.g. type or write responses, or a choice between activities like quiet reading or journal writing.
How do I use it?
- Look at your daily/weekly plan. Identify times where you can offer choices (see examples below). Focus on times or activities where engagement or participation can be improved.
- Limit the number of choices provided. A choice of two is a good starting point.
- Before offering the choice, ensure both options are available and they are motivating to the student.
- Provide the choice options to the student e.g. āDo you want to work at the group table or by yourself?ā
- State the studentās choice e.g. āYou have chosen to work at the group table.ā
- Follow through e.g. direct the student to the group table.
Additional information
Some students may benefit from a visual support e.g. a choice board. The visual example below allows the student to choose the order of activities to be completed.
addresses when function of behavior is to escape/avoid
6. Enriching/Modulating Sensory Stimuli
Considerations for learning
- Reduce extraneous and distracting sensory input (e.g. visually unclutter the room, reduce extraneous noise, and provide a quiet work/break area).
- Embed movement breaks in a way that is not over-stimulating or distracting to other students.
- In order to gain and maintain attention, use relevant visual cues and schedules and incorporate the studentās interests within activities.
- Incorporate calming activities into the studentās day as required.
- Ensure that you have the studentās attention before providing verbal instructions and provide visual cues where possible.
- Plan to gradually introduce unpredictable and busy sensory environments such as assemblies. Plan breaks or access to calming activities following activities that the student is likely to find stressful such as after returning from outside play breaks.
- Overcome difficulties with motor planning by breaking challenging motor tasks into small achievable steps.
- Provide opportunities for students to seek sensory information in appropriate ways. For example, if the student is chewing his or her pencil, provide āchewysā for the end of the pencil. As ācrashingā into other students may be an attempt to gain proprioceptive feedback, provide alternative gross motor opportunities to gain this input.
- Toileting and other self-care tasks can involve sensory challenges such as smells, bright lighting, smooth tiles, echoes, hand driers, āroughā or winter clothing, flowing water, and soap dispensers. Where possible, introduce sensations gradually, warn of upcoming sensations and incorporate the studentās interests or fascinations into the routine to help increase tolerance.
- Provide access to sensory-based reinforcing behavior supports by looking at preference assessment can give us clues as to what types of reinforcers are chosen based on sensory needs....Think tactile, olfactory, visual, auditory etc....
Using sensory input to keep the student alert and focused:
To ensure the student is alert and ready for learning, sensory input can be used to āwake upā or ācalm downā the nervous system. Movement breaks are particularly useful as slow, repetitive movement is calming, while fast, changeable movement can be alerting. Where possible, embed movement breaks within the school day, such as allowing the student to get up to get a glass of water or to run an errand.
addresses when function of behavior is access to tangibles and/or attention
A 4 Point Checklist for choosing the best evidence-based practice
Antecedent-Based Interventions: Visual Supports
VISUAL SUPPORTS: THE BASICS
WHAT ARE VISUAL SUPPORTS?
- Concrete cues paired with or used in place of verbal cues
- Provide learner with information about a routine, activity, behavioral expectation, or skill demonstration
- Evidence-based Practice
Includes: Pictures, Written Words, Objects, Visual Boundaries, Schedules, Maps, Timelines, Scripts, etc
3 Categories of Visual Supports
- Visual Boundaries
- Visual Cues
- Visual Schedules
Example of Visual Support Boundaries
Example of Visual Support Schedules
What behaviors do these schedules target?
Example of Visual Cues
Typical Visual Schedule Goals
- Increase frequency of calm transitions
- Increase predictability for student
- Decrease distractions
- Increase positive social interaction skills
- Increase Independence
- Reduce self-injurious behaviors
- Increase understanding of behavioral expectations
- Minimize teacher and adult support
- Increase understanding of expected task or activity
Are Visual Supports Really Necessary? For How Long?
In the table below, the outcomes identified by the evidence base are shown by age of participants
Is This the Best EBP to Try First?
Visual Supports: Planning, Using, Monitoring
Step 1: Planning for Visual Supports
Preparing Visual Boundaries
2. Use natural boundaries when possible, objects, furniture to clearly designate the area. If furniture isn't available consider using tape on the floor or wall, or sections of rug/carpet.
Preparing Visual Cues: Consideration of 2 Elements
- What information needs to be presented visually
- What form of representation
Based on our findings in the VS pre-assessment we will have a good idea of what information should be presented for the student.
~For example, if a student shows anxiety when they don't know how to complete the task, we would create visual instructions for them to reference.
Next, we would consider the form of representation for the visual cue which may include objects, photographs, drawings, picture symbols, words, phrases or a combination. The complexity of the representation should be matched with the ability of our student.
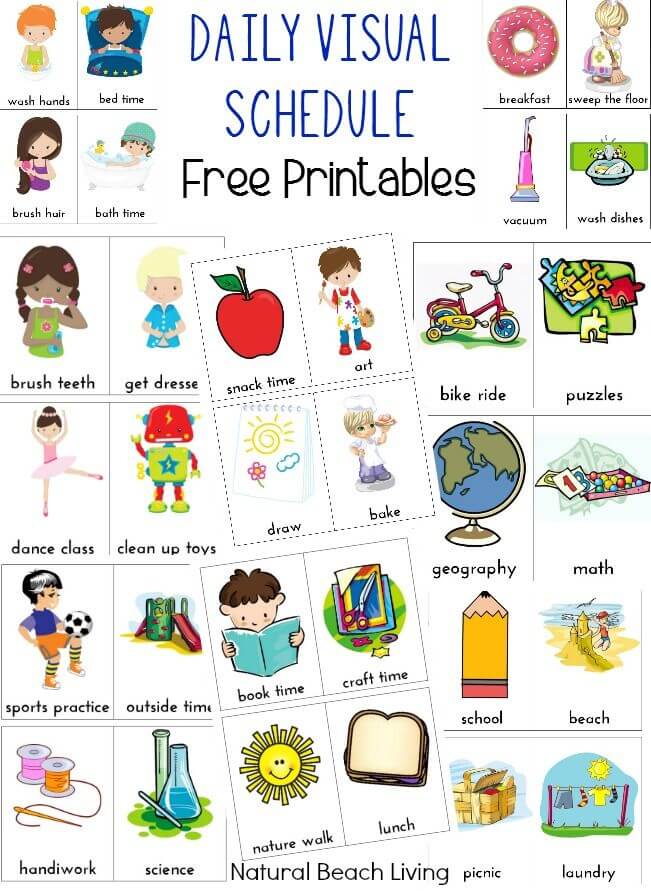
Preparing Visual Schedules: 5 Core Components
- Form of representation
- Length and format
- Method of manipulating schedule (rings, stationary, folder, stick etc)
- Location of schedule
- Method of introducing and teaching use of schedule
Addressing these will ensure that you create a schedule that promotes independence, increases consistency, and reduces anxiety.
1. Form of Representation
- Objects that will be used in an activity (functional objects)
- Objects that are symbolic of an activity (symbolic)
- Photos
- Words
- Drawings or picture symbols
- Phrases
- A combination of any of the above
Take into consideration discrepancies between the decoding and comprehension skills of students and create a schedule format based on their abilities.
2. Length and Format
- One item to signal transitions
- Two items presented left to right or top to bottom
- Three to four items also presented left to right or top to bottom
- 1/2 Day presented left to right or top to bottom
- Full Day presented left to right or top to bottom
- Technology-based schedule
When deciding length, consider if the student has anxiety about upcoming activities. Figure out if length of the schedule reduces or increases it. Some students do better when they can see all events of the day, while others find it overwhelming and more stressful.
3. Method of Manipulating
- Student carries object or visual cue that represents an upcoming area and then matches object or visual cue to a pocket, basket, or envelope in the correct location.
- Student carries object that will be used in next activity
- Student turns over visual schedule cue or places cue in a "completed" location when activity is finished or,
- Student marks off visual cue on schedule when completed.
4. Visual Schedule Location
- Schedule information is brought to student
- A stationary schedule in a consistent and central location is made, or
- A portable schedule that a student can carry with them
5. Method of Initiating
Options:
- Staff brings schedule to student, or
- The student moves to the schedule using a visual transition cue
If a schedule is in a stationary, central location or portable, we need to use a visual cue to let the student know that its time to use the schedule and move to the next location or activity. The visual cue could be a card with their name or picture of them at the schedule or phrase "check schedule" on it.
The student will use cue card to transition to their schedule, put that card in an envelope next to the schedule, pick the visual cue to transition to the next activity or place.
Additional Considerations
Should we include times?
Do we align with the school bell?
What are some motivational factors (favorite animal, or cartoon)?
Do we need to also have behavioral cues for the expectations in those activities or settings?
Step 2. Using Visual Supports
Teaching the Use of Visual Supports
- Introduce the student with the established boundary even if it's not new.
- Walk with student into the area and point out important boundaries and what tasks or activities happen in that area.
- Model what it looks like to stay within the boundary. It may also help to have a peer using the boundaries to provide more visual of expectations.
- Provide reinforcement when student stays in the boundary. Remember it takes practice so calm redirection is necessary when the student leaves the boundary.
Follow through is key
- Begin by introducing the developed visual cue
- If possible stand beside or behind so that they are looking at the information and not you when you prompt them to use it.
- Use short, concise and relevant words/terms when teaching the visual cue.
Levels of Prompting
When possible and when the student demonstrates their understanding of the purpose of the visual support, fade your prompts as quickly as possible, to minimize prompt dependency.
Key to Success: Consistency and Across Settings
Step 3: Monitoring the Use of Visual Supports
Resource Sharing
Time to Practice and Make and Take Samples!
Questions?
Tell me and I forget. Teach me and I remember. Involve me and I learn.
Email: kflade@burlcoschools.org
Phone: 609-261-5600 .6475