

Ignite Creativity with a Green Screen
If you don't look at any other resource on this page, for sure check out "Green Screen Workshop" linked below. This resource has step by step project directions for "Spinning into Art", Electric Company Style Silhouette Blends, a Snow Globe Effect (hello winter project idea!), and so, so much more.
It is really easy to get started with the app, and from there, with a little time and a lot of imagination you can inspire so much sharing and creation. I love creating animations in apps like Superhero HD and Fairytale Princess Maker on a green background, or using a green background in PicEdu to create cut out images (check out the App Smashing link below for a How-To).
Students are able to get the app from the App Portal.

Create a new project

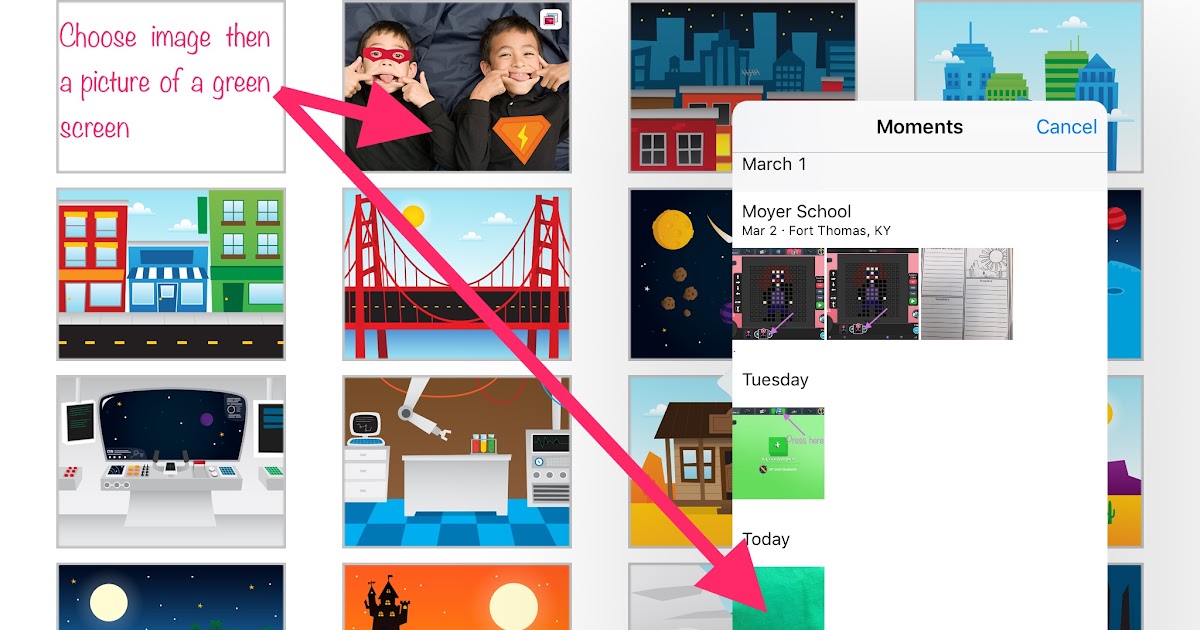
Layer in your images, live camera shot and videos
- The very bottom layer is the "Background". This is good for an image or pre-recorded video.
- The middle is the "Middle ground" and typically where we place the live camera
- The top layer is the "Foreground" and where you might put a photo that you resize or a video created on a green screen

Set up your Recording
- You will probably need to flip your camera - depending on how you are recording. If so, touch the camera icon on the top right
- When a layer is selected, a red box will appear, you can then resize or edit settings of that layer. A delete option will also pop up if you needed to get rid of a layer
- Record by pressing the red record button


Want more?
Email: heidi.neltner@fortthomas.kyschools.us
Website: http://ftisedtech.blogspot.com/
Twitter: @heidinelt