Homefront
RE/MAX real estate Newsletter - May 2018 Edition
In This Issue - The Mistake-Free Guide to an Easy-Care Yard
Let's Upgrade Your Yard, Shall We?
Having a beautiful yard doesn’t mean you have to spend every waking moment ensuring that it’s beautiful. No no, my friend. The trick is picking plants and landscaping materials that don’t need tons of help from you to look good. Here’s what to plant — and a whole bunch of other tips! — so you can have the best-looking yard in minimal time.
How to love your outdoor space instead of feeling like a slave to it.

The Best Choices You Can Make for a Practically Hassle-Free Yard
Stay away from rubber mulch. And Bradford pears.

8 Ways New Homeowners Accidentally Trash Their Yards
Avoid these rookie mistakes to keep everything beautiful.

4 Genius Yard Upgrades Even a Klutz Can Crush
No DIY skills necessary for these outdoor projects. Did we mention they’re really, really easy?

5 Awesomely Easy Landscaping Projects
No need for fancy DIY skills, a lot of money, or a ton of time to pull off these yard upgrades.

Livable Sheds: Silly Trend or Ultimate Hack?
5 questions (and answers) every homeowner should consider before building.

Mayfair Festival of the Arts
Mayfair Festival of the Arts is a 30-year tradition in the Lehigh Valley and it is making a comeback at Cedar Crest College!


The house. The yard. It’s all a part of the American dream, right? But after a few seasons with raking, mowing, fertilizing, watering, weeding, pruning, and more, having a yard can feel more like an endless fever dream.
Having a yard doesn’t have to suck up every a moment of your life. The trick is picking plants and landscaping materials that don’t need tons of help from you to look good. Here’s what to plant so you can reclaim some time.
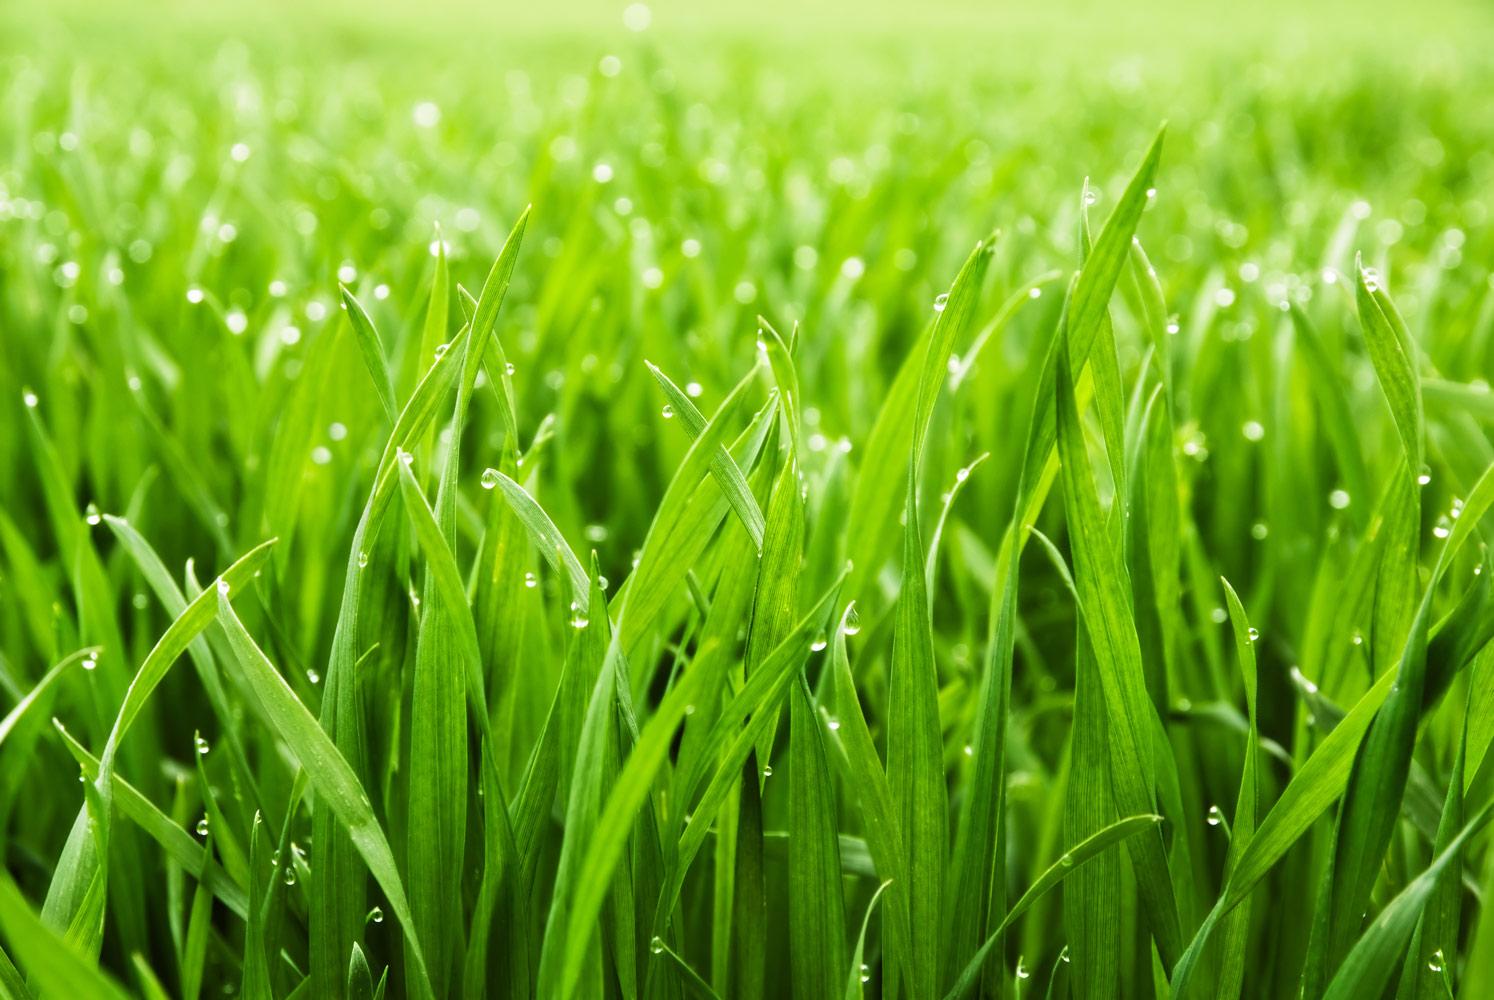
Grass
For being everywhere, grass is a lot of work. “It’s high maintenance,” says Abra Lee, a University of Georgia extension agent. “It needs a lot of mowing, fertilizer, and water. It’s prone to disease.”
Even so, it’s kind of a must for most yards. To make your grass maintenance life easier, go with as small a patch of grass as you can get away with, and plant these types:
Grass for Northern Climates
- Fescue: It’s disease resistant and slow growing, so it needs less mowing and fertilizing than other types. You can also grow it quickly from seed, cheaper than buying sod.
Grass for Southern Climates
- Bermuda: It grows in poor soils and can withstand kids and dogs romping on it nonstop. It’s nearly impossible to kill — good if you’ve no interest in caring for a prima donna lawn.
For the Greenest Grass
Add nitrogen. And resist the urge to mow it super short. That'll definitely brown it up. Maybe kill it.

Bushes
Pick bushes you don’t need to prune constantly. The time you spend trimming boxwoods into tidy little balls is part of your life you’ll never get back.
- Azaleas: They look best when you let them grow into natural, unpruned drifts. There are more than 10,000 named varieties, so there’s an azalea for your yard and climate. They can live for a century so you may die before they do. If you live in colder climate, go with rhododendrons, azaleas’ larger, tougher cousins.
- Emerald Green Arborvitae: It’s a fast-growing evergreen that can stand up to heat and humidity. It’s a good choice for a hedge. They’re tidy, Christmas-tree shaped plants you’ll never need to prune.
- Hydrangeas: They’re fast growing and covered with fab blooms from spring till fall. Prune a hydrangea and it will not make flowers, which defeats the purpose of having them. There are hundreds of varieties so you’ll find one that will thrive in your area.
- Cryptomeria: This one’s a fast-growing evergreen that tolerates neglect. It’s also called a Japanese cedar. It’s tall, tapering, and elegant.
Flowers

Perennials are the lazy gardener’s friend. Plant them once, and they’ll come back year after year.
- Coneflowers: They bloom all season and come in a rainbow of colors, but the varieties with purple or white blooms are the sturdiest. An added bonus: They’re great for bouquets. Cut them and bring them inside. Fresh flowers from your own yard! What’s not to love?
- Black-Eyed Susans: These yellow flowers look like the ones kids draw. They bloom from last frost to first frost and they can take almost all the heat, drought, and neglect you and Mother Nature can dish out. Also, they will plant themselves, dropping lots of seed so you’ll get new plants each spring.
- Russian Sage: Don’t fertilize it or water it too much, and it will reward you with a mound of silvery foliage and spires of violet-blue flowers that last all summer.
Trees

First, buy the largest young tree you can afford, because a tiny switch of sapling might not become a big tree until you’re eligible for AARP. Second, don’t plant a Bradford pear. Ever. They crack and fall too easily. Instead, plant these:
- Oaks: They’re strong and can live for a century or more. They can take a long time to become majestic giants, so if you’re looking for shade, prepare to be patient. Pin oaks and sawtooth oaks get big the fastest; they can grow as much as two feet a year.
- Crepe Myrtles: They make flowers in the summer and their leaves turn in the fall, so you get two seasons of color. Best of all, they grow very fast, going from sapling to mature tree in five years.
- Tulip Poplar: They grow to a regal 90 feet tall, and make tons of shade. You’ll get tulip-shaped flowers from it in late spring, and bright yellow leaves in the fall. They’re disease resistant and strong enough to withstand winds that would take down other trees.
- Cherry: They’re little — 20 to 35 feet tall — so they won’t overpower a small yard, and they make white or pink flowers in the spring. Stick with the non-fruiting types because they’re easier to grow and less messy.
- Eastern Redbud: This is a small, hardy tree that grows fast, and has spring flowers and fall foliage. Birds eat their berries, so you’ll make new feathered friends
Groundcover

Plant some instead of grass in places where there’s not much foot traffic. They’ll smother weeds, and they grow just fine with no help from you.
- Ornamental Grass: It makes fountains of wispy, slender foliage in reds, greens, golds. Varieties that are short and grow in clumps — like blue fescue, mondo grass, and liriope — are the best choice. And yes, there is grass in the name, but, no, you will not have to mow it.
- Golden Moneywort: This creeping vine grows fast, and once established, looks like a carpet made of tiny green-gold leaves. It keeps its color through the winter unless you live in Fargo.
- Ajuga: Another creeper (the plant type, not the human type who lurks at malls), this 2-inch tall plant has shiny, dark green leaves and, in the spring, blue flowers. It carpets the ground and will even grow in shade.
Mulch

Mulch is your friend. Put it around your plants, and it will put the smackdown on weeds, you won’t have to water as often, and it’ll enrich the soil when it decays into the earth. Enriched soil means healthy plants. Healthy plants don’t get sick and die.
- Hardwood or Pine Bark: These are the longest-lasting natural mulches. You’ll need to replace it once a year because it decays into the earth. Wait, you say, can’t I use some of that awesome rubber mulch that will still be there when my kids are in college? Yes, you can. But rubber mulch does a poor job of stopping weeds and will not feed your soil, so you’ll need to fertilize your plants and pull weeds regularly. Also, research has shown rubber mulch contains chemicals that can leach into the soil and eventually kill plants. Note: Rubber mulch is great for areas where you just want to cover the ground, not grow plants.
Mindset
OK, it’s not a landscaping material, but how you feel about your yard makes a big difference in how you feel about caring for it. Here’s the right approach: It’s your dang yard, so pick the plants and landscaping materials you’ll enjoy spending time with.
“The reason we have a yard is so we can get joy in reconnecting with nature and lose the stress of our everyday lives,” says Patrick Beasley, a landscape architect. “Plant things that make you happy, and taking care of them will be a part of your life you enjoy.”


You’ve done it. You own a house with a yard. The great outdoors. Amber waves of grain. OK, maybe not grain, and ideally you want it green, not amber.
But now that you have it, how do you keep from screwing it up? By avoiding a few common gaffes that landscaping experts say new homeowners make waaay too often.
“They end up buying the wrong fertilizer, they have no clue what weed killer is, they kill their entire lawn, they kill their bushes — and then they call me,” says Dean Granat, who runs D&D Landscape & Sprinkler Services Inc. in Buffalo Grove, Ill.
Here’s what the pros say newbie homeowners often do wrong with their lawns and yards:
#1 Not Following Product Instructions
Peter and Leah Lenz, two bright, educated people (data scientist and attorney) were thrilled when they bought their Westchester County, N.Y., home — only to have their lawn undone by a little bugger known as the Japanese beetle.
“When we looked at the house originally, we weren’t even looking at the yard because it was March, and it was covered with snow,” says Peter. “But when we moved in, we noticed the previous owners had patched holes where the beetles had already hit.”
Once Peter identified the problem, he launched “full-out chemical warfare.”
Sadly, he did not read — nor heed — the instructions for his “weapons,” and the beetles won the first round.
“There are different granulated chemicals you can put down in the spring and the fall, and I discovered there are different formulations for the different seasons,” Peter says. “One of the mistakes I made the first year was using the spring formulation in the fall, and it didn’t do a damn thing.”
Today the lawn is lush and green thanks to the proper use of anti-beetle products the second time around. “I smile when I see the backyard,” Peter says.
#2 Misusing Fertilizer
The No. 1 problem new homeowners have with fertilizer, says Eric Groft of the landscaping firm Oehme van Sweden, is overdoing it.
“Instead of putting in the correct amount of fertilizer, they put in more — and more is not more.”
Too much fertilizer adversely affects plant growth, can burn and even kill grass and plants. And, if it runs off into waterways, can cause toxic algae bloom.
To avoid those awful outcomes, prep and apply fertilizer with care. Use only the amount of recommended fertilizer — or less.
And don’t skip a single prep step. Most powdered or liquid fertilizers need to be mixed with water.
Timing is important, too. Different species of grass have different needs. Warm-season grasses (Bermuda and St. Augustine) need to be fed when temperatures are warm. Late spring is usually good. Cool-season grasses (Kentucky bluegrass and tall fescue) prefer feeding in cooler temps, such as late fall, but before frost sets in.
#3 Not Watering Grass Deep Enough
Brown and dry, dehydrated grass is ugly. it invites weeds to set up squatting rights. But it’s not just about the ugly.
“If you’re thinking about a future resale, a good lawn is what gets people in the front door,” says Valerie Blake, a REALTOR® in Washington, D.C. A sad lawn just turns them away.
But novice homeowners often think watering a little bit here and a little bit there will suffice. If the grass is wet, it’s watered, right?
Not quite. It’s really a matter of how moist the soil is underneath. Ideally, you want the soil to be moist 6 inches deep.
Here’s how to make sure your lawn gets enough water:
- Use a shovel to check that the soil is moist 6 inches deep.
- The first time you water, check every 15 minutes.
- Keep track of how long it takes to get moist.
- Water that same amount of time the next time.
How often should you turn on the sprinklers? Do your homework, and, if the Joneses do in fact have a beautiful lawn, note how often they water and follow suit. (We won’t tell.)
#4 Cutting Grass Too Short
If mowing isn’t your idea of weekend fun, you might be tempted to skip a round or two by cutting the grass extra short.
And while cutting the grass shorter may save you from mowing so often, it ends up starving the plant, as sunlight is collected via the leaves. Hello, brown lawn.
“Grass should never be cut lower than two and a half to three inches,” says Granat.
#5 Overusing Weed Killer
“People will buy weed killer thinking it’s for dandelions and clover and will spray it over their whole yard,” Granat says.
“I had a customer who sprayed his whole lawn with weed killer. It killed everything and cost $8,000 to resod the lawn.”
So, only use the weed killer on small, isolated areas, OK? Non-chemical solutions work, too, such as pulling weeds out by hand or dousing them with boiling water.
But prevention is best. Smother them with mulch (add newspapers for an extra layer of protection) before they can take root.
#6 Trimming Limbs and Branches the Wrong Way
Out-of-control bushes can block windows and give insects (and burglars!) a direct path into the house. The solution? Cut them back.
But know where to cut. “Don’t saw it off in the middle of the branch,” says Groft. And don’t cut it flush with the trunk either.
You want to leave the “branch collar” — usually a small bump where the trunk and branch come together.
That bump contains special cells to help a tree or shrub recover from its wounds. Leaving the branch too long or cutting it too short prevents the branch collar from doing its job, which means instead of losing a branch or two, you could lose the entire tree or bush.
#7 Putting Plants Too Close Together
Impatience is really the culprit here. You want a lush yard fast. So you buy more plants and plant them closer together.
That’s a costly mistake. First, you’re buying plants you don’t need. And second, those plants will lose their looks really soon — or even die.
By planting bushes, shrubs, trees, annuals, or perennials closely together, you’re not giving them room to grow. And you’re forcing them to compete with each other for sunshine and nutrients in the soil. You won’t be happy with those results.
Nurseries usually include recommendations on how far apart to plant, but to give you an idea, here are a couple of guidelines:
- Trees usually need to be planted as far apart as their mature width.
- Perennials should be 6 to 36 inches apart, depending on their mature size.
It’s also OK to remove existing plants you don’t like. “If you have 30-year-old evergreens crowding a walkway, don’t be afraid to be subtractive,” Groft encourages.
#8 Letting Your Pet Urinate Wherever
It’s so tempting to let Fido go where and whenever he feels like it. But after awhile, you’ll notice yellow grass. Then dead grass. And that bush you planted a couple of months ago? Yeah, it’s half dead, too. They’re being burned alive by your dog’s urine. Not good.
But there are things you can do, such as training Fido to go in one special area. You could even make it a spot without any grass to kill at all.
“I’m starting to install a lot of dog runs for people. They’re all fenced in and we use some kind of stone on the surface,” Granat says.


You don’t need to be the host of an extreme home makeover show to build an amazing backyard. In fact, the transformative projects below are easy enough for even the klutziest home improvement newbie to complete.
Just don’t be shocked when the Johnsons appear at your door with hot dog buns in hand, begging to throw a cookout at your place.
#1 No-Blow Outdoor Curtains
When Cara Daniel of “The Project Addict” blog spied a neighbor’s unruly outdoor curtains, she hacked some for her porch that could withstand a gusty Tornado Alley afternoon without upending a glass of lemonade or ensnaring an unsuspecting guest.
She found the sweet spot by slipping conduit pipes through the curtain tabs up top and a hem at the bottom, and securing the pipes with wires (taut, but not too tight).
Daniel did all the hard work of dreaming up the curtains, so a DIY newbie can definitely recreate the project, which uses easy-to-find materials like washers and camping stakes.
Upkeep has been equally simple thanks to her sturdy choice of fabric. “The marine fabric is better than outdoor fabric that I bought,” says Daniel. The easy-to-wash choice has kept the curtains looking picturesque after five years of use.
#2 Shutter Privacy Fence

No fence? No problem! Daune Pitman of the “Cottage in the Oaks” blog MacGyvered an attractive privacy feature from a friend’s pile of discarded shutters.
The $0 price wasn’t the only thing that made the material desirable for an outdoor nook’s privacy screen, though. “They were tall,” says Pitman, “could easily be attached to posts, had the vents — which allows air to flow through — and didn’t weigh too much.”
After nailing the shutters to four-by-fours cemented into the ground (an easy task with a store-bought bag of pre-mixed cement), the nook-facing side got a charming French-blue facelift and the back a coating of foliage-matching bark brown paint.
It’s a kind of self-explanatory project because all you need is:
- Shutters
- Posts
- Cement
- Hinges (plus screws) for the shutters
- Paint
What could be easier?
#3 PVC Pipe Pergola
Suburbanite Monica Mangin of the site “East Coast Creative” jumped at the chance to rehab a client’s neglected urban patio.
The showstopper was a clever PVC pergola decked with industrial-style lights. She was inspired by traditional wood pergolas, but wanted an easier material.
“A lot of mason jar light fixtures were trending,” says Mangin.”I liked the look of that but wanted to turn it a little more industrial.”
PVC pipe — with rebar inside as an anchor — won out for its ease on the DIYer and wallet. Could it get any easier?
A simple coat of hammered metallic outdoor spray paint gave the pipe a pricier look, and industrial-strength zip ties kept the string of dimmable, Edison bulb-style lights in place.
Although the project doesn’t take much time or skill, Mangin recommends recruiting two friends to help. Have one hold each end of the pergola while the third secures the lights with zip ties. Overall, it’s a dinner party-friendly cinch that’s surpassed the one-year mark.
4. Solar Light Hose Guards

Topping the list of Sad Gardening Ironies is when the hose you’ve lugged out to help your landscaping stay lush mows over a bed of delicate flowers you just planted. Sigh.
Lynda Makara of the blog “Home of Happy Art” figured out a pretty and pragmatic solution using affordable solar lights.
The DIY part entailed trashing their original plastic stakes (they weren’t strong enough to hold a hose in place), hammering 24-inch pieces of rebar into the ground, and slipping a light over each piece.
Those sturdy posts could handle even the bulkiest hose, protecting Makara’s plantings during waterings then casting a lovely spotlight on them post-dusk.
“The rebar is maintenance free,” says Makara. “I have had to replace some of the batteries in the solar lights, but I think that’s pretty normal.”
It doesn’t get much easier than hammering a stake into the ground. Although Makara suggests straightening the rebar with a level, that’s about as technical as it gets to create a more functional, flowering garden.

5 Awesomely Easy Landscaping Projects

No need for fancy DIY skills, a lot of money, or a ton of time to pull off these yard upgrades.
It’s your yard — yours to do with as you wish. And while that’s great, that doesn’t mean you have to be one of those people who spends every spare moment in their yard, sprucing it up.
But, still, your landscaping could use a little something. But something easy.
Here are five totally doable projects that your budget will barely notice, but your neighbors definitely will:
#1 Add Some (Tough) Edging

Tell your grass who’s boss with edging that can stand up to even the crabbiest of all crabgrasses.
But don’t make the mistake that many homeowners make of buying the flexible plastic stuff, thinking it will be easier to install. It’ll look cheap and amateurish from day one.
Worse, it won’t last. And before you know it, you won’t be able to tell where your garden bed ends and your “lawn” begins.
Instead buy the more rigid, tough stuff in either fiberglass, aluminum, or steel.
Tips on installing edging:
- Lay out a hose in the pattern you want.
- Sprinkle flour or powdered chalk to mark the hose pattern.
- Use a lawn edger (or spade) to make an incision for the edging.
- Tap the edging into the incision with a rubber mallet.
The cost? Mostly your time, and up to $2.50 a square foot for the edging.
#2 Create a Focal Point with a Berm

A berm is a mound of gently sloping earth, often created to help with drainage. You can also build them to create “island beds,” a focal point of textures and colors that are so much more interesting than plain ol’ green grass.
Plus, they’ll give you privacy — and diffuse street noises. What’s not to like about that? Especially if you live in more urban areas.
For most yards, berms should max out at 2-feet high because of the space needed to properly build one.
They need a ratio of 4-6 feet of width for every foot of height. That’s at least 8 feet for a typical 2-foot high berm. So be sure you have the room, or decrease the height of your berm.
Popular berm plantings include:
- Flowering bushes, such as azaleas
- Evergreens, such as blue spruce
- Perennials such as periwinkle
- Tall, swaying prairie grasses
- Lots of mulch to keep weeds away
The Cost? Usually less than $300, depending on how big you make it, how much soil you need to buy to get to your desired height, and what plants you choose.
Save on Soil
#3 Make a Flagstone Wall
Aim to build a wall no more than 12 inches tall, and it becomes a super simple DIY project — no mortar needed at all!

How to build an easy flagstone wall:
- Dig a trench a couple of inches deep and wide enough to accommodate the flagstones.
- Fill with pea gravel and/or sand and tamp to make level.
- Lay out the flagstones to see their shapes and sizes.
- Stack the smaller stones first.
- Save the largest, prettiest flagstones for the top layer.
- Backfill with gravel.
Choose a stone of consistent thickness. Flagstone might be limestone, sandstone, shale — any rock that splits into slabs.
The cost? About $300 for stones and sand (a ton of 2-inch-thick stone is enough for a wall 10 feet long and 12 inches high).
#4 Install a Path with Flagstone or Gravel
There’s something romantic, charming, and simply welcoming about a meandering pathway to your front door or back garden — which means it has super-huge impact when it comes to your home’s curb appeal.
You can use flagstone, pea gravel, decomposed or crushed granite, even poured concrete (although that’s not easy to DIY).
A few tips for building a pathway:
- Allow 3 feet of width for clearance.
- Create curves rather than straight lines for a pleasing effect.
- Remove sod at least 3 to 4 inches deep to keep grass from coming back.
- If you live in an area with heavy rains, opt for large, heavy stones.
The cost? Anywhere from a couple of hundred bucks to upwards of $500 depending on the material you use, with decomposed granite being the least expensive, and flagstone (also the easiest of the bunch to install) the costliest.
#5 Build a Tree Surround

Installing a masonry surround for a tree is a two-fer project: It looks great, and it means you’ve got less to mow. Come to think of it, it’s a three-fer. It can work as extra seating when you have your lawn party, too!
All it takes is digging a circular trench, adding some sand, and installing brick, cement blocks, or stone. Just go for whatever look you like best.
The trickiest part is getting an even circle around the tree. Here’s how:
- Tie a rope around the tree, making a loop big enough so that when you pull it taut against the tree, the outer edge of the loop is right where you want the surround to be.
- Set your spade inside the loop with the handle plumb — straight up and down. Now, as you move around the tree, the loop of rope keeps the spade exactly the same distance from the base of the tree, creating a nice circle.
Then build the tree surround:
- Dig out a circular trench about 8 inches deep and 6 inches wide.
- Add a layer of sand.
- Set bricks at an angle for a saw-tooth effect or lay them end-to-end.
- Fill the surround with 2 to 3 inches of mulch.
The cost? Super cheap. You can do it for less than $25 with commonly-available pavers and stones.

Livable Sheds: Silly Trend or Ultimate Hack?

5 questions (and answers) every homeowner should consider before building.
So long, storage shed.
Homeowners across the country are converting these sheds into tricked-out spaces to play, entertain, and work in — complete with drywall, paint, furnishings, and even utilities.
Kind of hard not to want one once you see one. Admit it, you’re trying to figure out exactly where you’d put one, right? But are these picture-perfect livable sheds really worth your money and yard space? Here are a few questions and answers to help you figure that out.
Is the Cost of Building a Shed Worth It?
Let’s cut to the chase: Real estate experts agree the value of a livable shed is in the eye of the beholder — and that doesn’t necessarily translate into increased resale value.
“I’d put it in the category of a pool,” REALTOR® Micki Sanderson says of livable sheds in her Amherst, Mass., market. Add one for your own enjoyment, but don’t expect it to bring big bucks. She expects homeowners could recoup the cost to add electricity, but not plumbing, given the higher installation costs.
A shed’s resale value is limited, in part, because they are considered “outbuildings” or “accessory structures.” According to the American National Standards Institute’s appraising standards, used in most parts of the country, these detached spaces — and even beautifully appointed guest houses — are not calculated into a home’s “general floor area” of finished square footage.
But resale price is one thing. A great feature that helps seal the deal is another.
REALTOR® Diane Taillon in Ephraim, Wis., believes a livable shed can increase a home’s desirability — if framed as the spectacular boon it is.
“It definitely, in my opinion, helps sell homes. It’s an amenity that is soattractive,” she says. Staging a gardening shed as a she-shed helped her sell one home, and just describing the potential of a junk-filled shed was enough to sell another.
What Purpose Will Your Shed Serve?
Now that you know these vamped-up outbuildings probably aren’t going to pay for themselves, you might still really want one. And that’s when they offer the most value — when they make you happy.
Whether using it for working, reading, yoga, or artistic pursuits, a livable (or workable or playable) shed adds a new functionality to your home to help you enjoy it more, and use it more.
For artist Maria Varmazis, a studio shed provides an ideal sanctuary outside of her Boston home. Here, she can paint, make a mess, and not have to worry about cleanup before her cats find their way in — and it’s made her more productive.
“I’ve been able to do more work than I hoped,” Varmazis says. “Just having the studio there is motivation.”
How Much Do Livable Shed Kits Cost?
A very basic 10-by-10-foot engineered wood kit from a home improvement store runs about $900. And if you’re wanting things like extra windows, bigger doors, flower boxes, etc., you’ll pay more. While that may sound affordable, there are additional expenses that aren’t included.
What shed kits don’t include:
- Permits
- Foundation and flooring
- Shingles
- Drywall
- Electricity
- Insulation
- Plumbing
- Installation if you’re not DIYing it
A poured foundation will cost about $75 in materials, and if you hire someone to do it, they’ll charge up to a $100 an hour.
Electrical materials will cost around $150 to run a line from your house to a shed 50 feet away. But unless you have this specific skill set, you’ll need to call in an electrician. At $50 to $100 an hour, that brings the cost to $500 or more.
And if you’re looking to trick out your shed with a wet bar or convenient bathroom? Plumbing is an even more costly addition, starting at $1,000 to $1,500 just to run the supply and drain lines.
Watch out for your local laws, too. There could be some costs there in the form of permits, the type of materials that are permitted, etc. If you fail to check off all the necessary boxes, you could receive a fine — or, even worse, be forced to undo some or all of the construction.
How Much Can Be DIYed to Save Money?
The kits make it easy for even the most novice DIYers to do some of the work, which will knock down labor expenses.
Varmazis and her husband handled the permits and DIYed the interior of their shed to save money. But they paid a crew to erect their shed’s shell because they weren’t confident they had the skills to do it well.
You, on the other hand, might be able to rouse your carpenter-savvy friends into an old-fashioned barn-raising, and then pay a pro to make the inside look really sweet.
Is Your Climate Suitable for a Shed?
If you live in a severely cold climate, be honest with yourself about whether braving the elements will deter you from using your shed, and what it might cost you to make it truly livable in terms of building materials and utility bills, says Sanderson.
It’ll need a pitched roof as well as insulation, a source of heat and possibly double-pane windows to keep you from risking frostbite.
Also, know that most kits are built for more temperate climates. So if your home’s in a frigid climate, it may be best to consult with a local vendor that knows what materials your shed needs to keep you “living” in it.

Mayfair Festival of the Arts (May 25 - 27)


RE/MAX real estate
Email: joel@lehighvalleyhomes.com
Website: http://www.LehighValleyHome.com
Location: 3120 Hamilton Boulevard, Allentown, PA, United States
Phone: 610-770-9000
Facebook: www.facebook.com/LehighValleyHome/